
A leaking tap is often caused by a worn washer, cartridge or seal, and in many cases you can fix the problem without replacing the whole tap. The right repair depends on the type of tap you have and where the water is leaking from, so it helps to identify the cause before you start taking anything apart.
This guide walks you through the repair step by step, from checking the tap type and shutting off the water to replacing the faulty part and testing the tap afterwards. It also explains what to do if the leak is coming from somewhere else or the repair does not stop the drip.
Fix Your Dripping Tap in 7 Easy Steps
Before you start taking anything apart, identify the type of tap you have and where the water is escaping. This will help you work out which part is most likely causing the leak and avoid replacing components unnecessarily.
Step 1: Identify the Type of Tap You Have
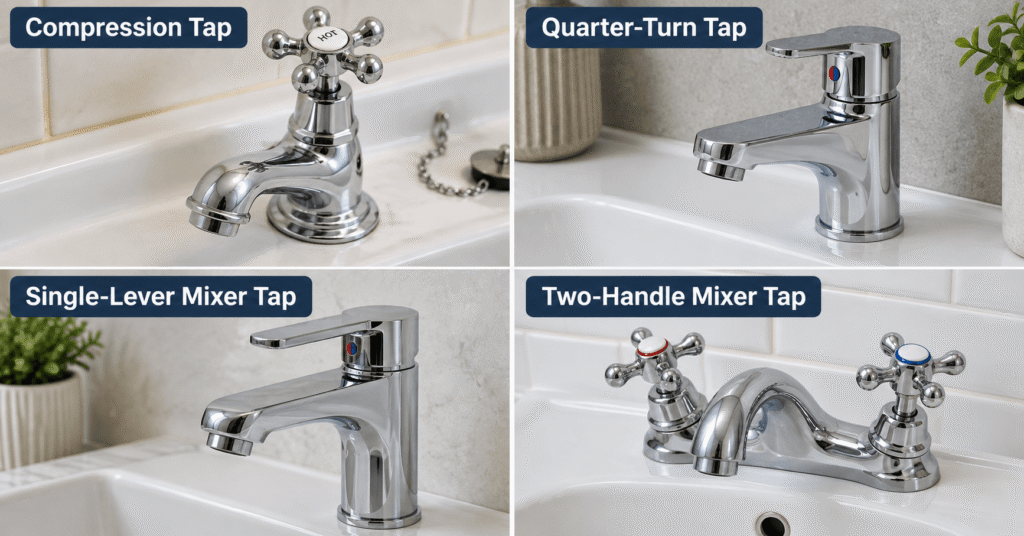
Start by looking at how the tap opens and closes. The internal mechanism differs between tap types, so a leaking tap does not always mean you need to replace a washer. The most common types you are likely to have in your home include:
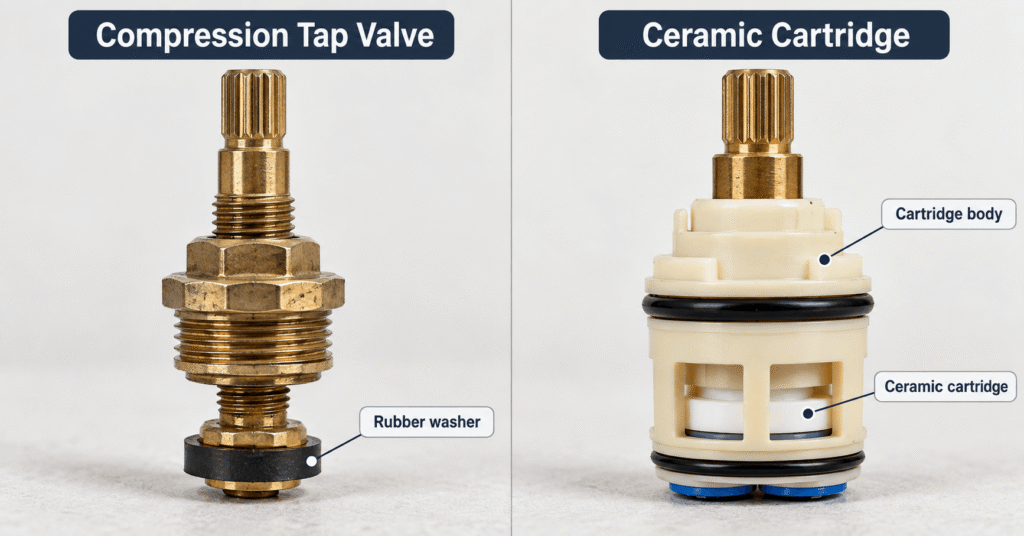
- Compression tap: These usually have separate hot and cold handles that need several turns to fully open or close. Inside, a rubber washer presses against a valve seat to stop the water. If the tap drips from the spout when it is turned off, a worn washer is one of the first things to check.
- Quarter-turn tap: These open and close with roughly a quarter turn rather than several rotations. They commonly use a ceramic disc or cartridge instead of a traditional rubber washer, so replacing a washer will not solve the problem.
- Single-lever mixer tap: One lever controls both the water flow and temperature. These generally use a cartridge inside the tap body, and a persistent drip from the spout often means the cartridge or one of its seals needs attention.
- Two-handle mixer tap: These have separate hot and cold controls but feed water through one spout. Depending on the design, they may use traditional valves and washers or ceramic cartridges, so you may need to remove the handle to confirm what is inside.
.If you are unsure, look at how far the handle turns. A tap that needs several rotations is more likely to use a traditional washer, while a tap that opens with a short turn is more likely to use a cartridge or ceramic disc. You do not need to buy the replacement part yet. Once the tap is dismantled, take the old washer or cartridge with you so you can match the replacement properly.
Step 2: Work Out Where the Leak Is Coming From
Once you know what type of tap you have, the next step is to pinpoint where the water is escaping. The location of the leak gives you a much better idea of which part is likely causing the problem and whether the repair is inside the tap or somewhere in the surrounding plumbing.
| Where You See Water | What It Usually Points To |
|---|---|
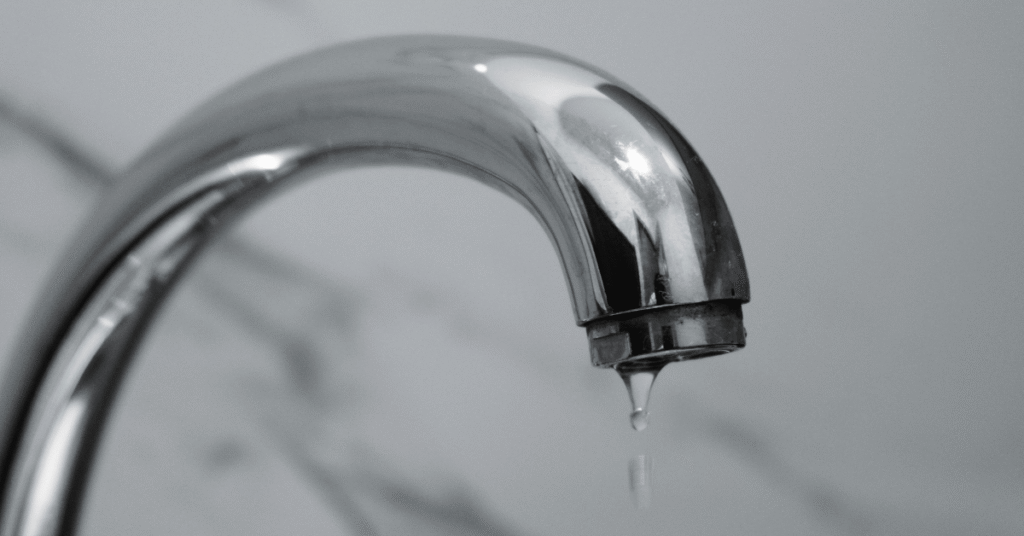
| Dripping from the spout | A worn washer on a compression tap, or a faulty cartridge/ceramic valve on a mixer or quarter-turn tap |
| Leaking around the handle | A worn O-ring, seal or cartridge allowing water to escape around the spindle or handle |
| Water around the base of the tap | A damaged base seal, worn O-ring or loose fitting where the tap meets the sink or basin |
| Water underneath the sink or basin | A leaking flexible hose, compression fitting, connection or pipe rather than the tap mechanism itself |
If the leak is coming from the spout, the problem is usually inside the tap mechanism itself. On a compression tap, that often points to the washer or valve seat; on a mixer or quarter-turn tap, the cartridge or ceramic valve is more likely to be the issue.
Leaks around the handle or base usually point to seals, O-rings or fittings rather than the main washer. If the water is underneath the basin, check the flexible hoses and pipe connections as well, because the source may be outside the tap body.
Once you have narrowed down where the water is escaping, you can shut off the supply and start the repair with a much better idea of which part needs attention.

Step 3: Turn Off the Water Supply
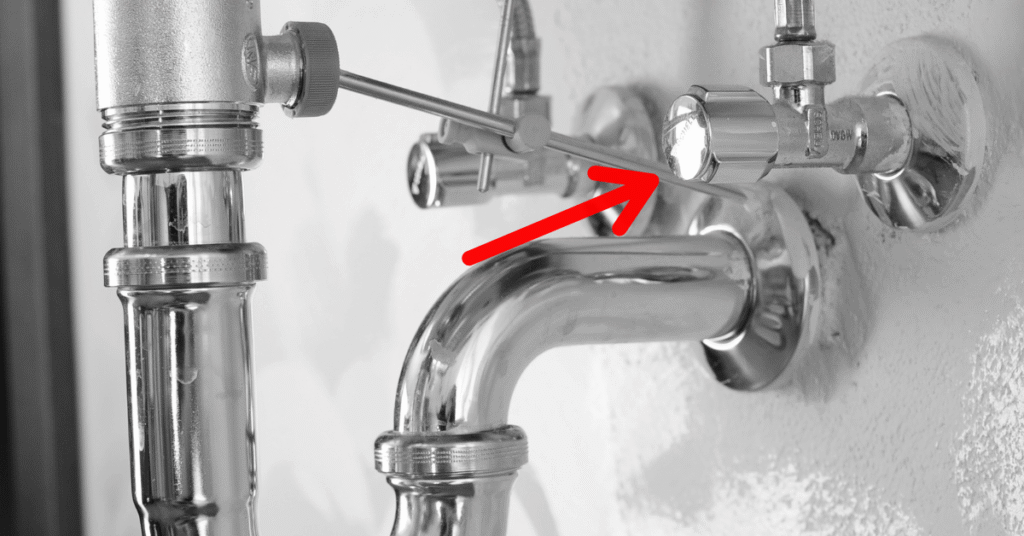
Before you remove any part of the tap, shut off the water supply. If there is an isolation valve on the pipe beneath the sink or basin, turn that off first. If there is no local isolation valve, you will need to turn off the main water supply to the property.
Once the water is off do the following:
- Open the tap fully: This releases any remaining pressure and lets the water left in the tap and nearby pipework drain out before you start.
- Plug the sink or basin: Small screws, washers and clips are easy to drop once you start dismantling the tap, so block the waste before removing anything.
- Place a towel under the tap and around the base of the sink or basin: This will catch any remaining water and help protect the surrounding surface while you work.
- Check that the water has stopped completely: Do not start taking the tap apart while water is still flowing. If it continues, check that you have closed the correct isolation valve or the main supply.
If water continues to flow after you have closed the isolation valve, stop and check that you have turned off the correct supply before going any further.
Step 4: Remove the Tap Handle
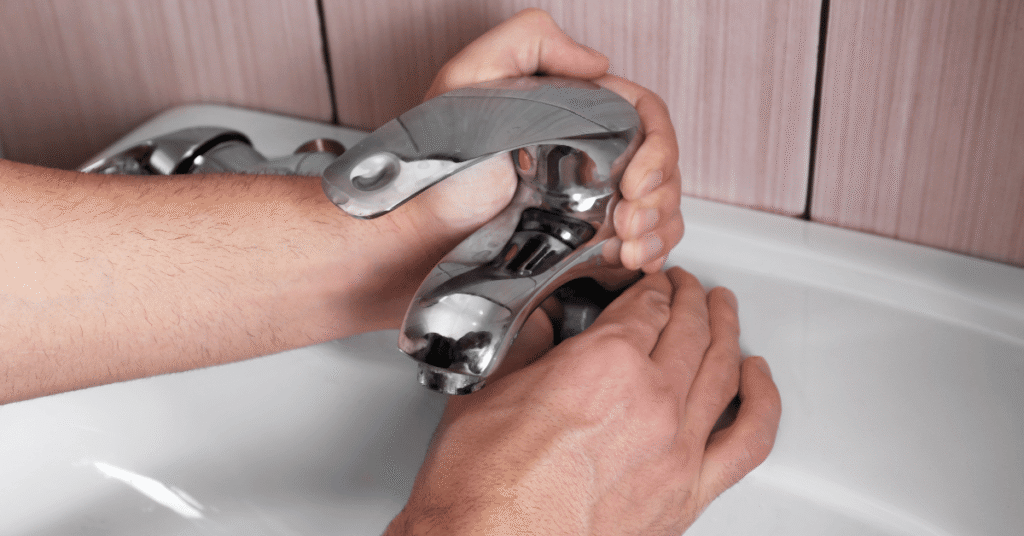
Once the water supply is off, you can start opening the tap. The way the handle comes off depends on the design, so take a moment to look for a screw, cap or small retaining fitting before forcing anything.
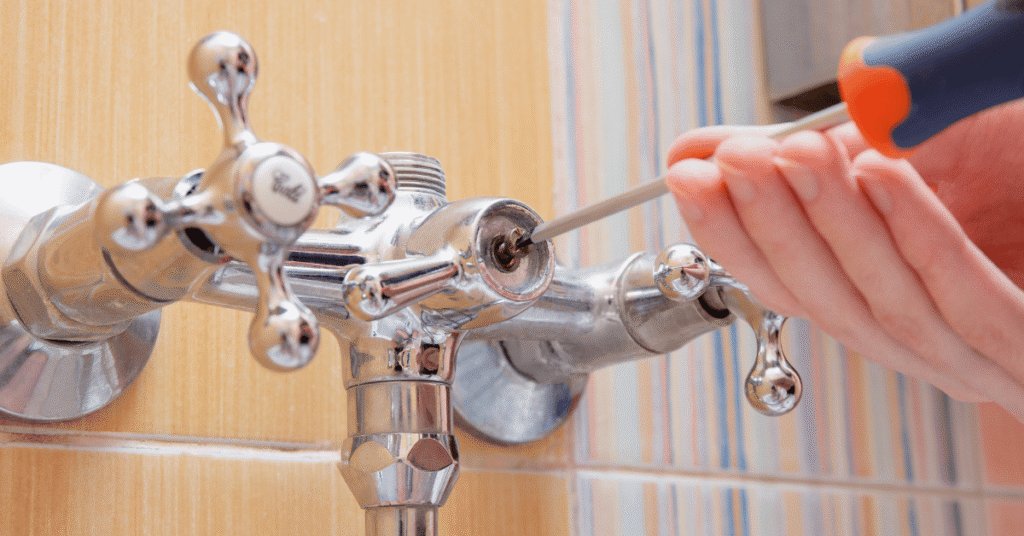
- Look for a decorative cap: Many taps have a small cover on the top or front of the handle. Carefully lift it off with a flat-head screwdriver to expose the screw underneath.
- Check for a retaining screw or Allen screw: Some mixer and quarter-turn taps use a small screw underneath or behind the handle instead of one on top.
- Undo the screw carefully: Keep one hand on the handle while loosening it so it does not drop or twist unexpectedly.
- Lift the handle off: Once the screw is removed, gently pull the handle away from the tap body. If it feels stuck, work it loose gradually rather than forcing it.
- Keep the small parts together: Put screws, caps and clips somewhere safe in the order you remove them. This makes reassembly much easier later.
If the handle is badly seized or corroded and will not come free with gentle pressure, stop before you damage the tap. At that point, forcing it can turn a simple repair into a full tap replacement.
Step 5: Remove the Valve or Cartridge
With the handle off, you should now be able to access the internal mechanism that controls the water flow. What you remove next depends on whether the tap uses a traditional valve and washer or a cartridge.
- Remove any decorative cover or retaining collar: Some taps have an additional cover around the valve or cartridge. Unscrew or lift this away carefully so you can reach the fixing underneath.
- Loosen the retaining nut or valve assembly: Use an adjustable spanner and turn it slowly. Hold the tap body steady where possible so you are not twisting the whole fitting against the sink or basin.
- Lift out the valve or cartridge: Once it is loose, remove the internal component carefully. Take note of how it sits in the tap before pulling it out so you can refit the replacement in the same position.
- Check what type of part you have removed: A compression tap will usually have a valve assembly with a rubber washer at the bottom. A mixer or quarter-turn tap is more likely to contain a cartridge or ceramic valve.
- Inspect the part before replacing anything: Look for obvious wear, cracks, damaged seals, corrosion or flattened rubber components. If you are buying a replacement, take the old part with you so you can match the size and design correctly.
Once the valve or cartridge is out, you can move on to replacing the faulty part.
Step 6: Replace the Worn Washer or Cartridge
Now that the internal mechanism is out, replace the part that is most likely causing the leak. What you do here depends on whether your tap uses a traditional washer or a cartridge.
If your tap uses a washer do this
- Find the washer at the bottom of the valve assembly: It is usually a small rubber disc held in place by a screw or fitting.
- Check it for wear: A flattened, cracked, split or hardened washer may no longer seal properly when the tap is closed.
- Remove the old washer: Undo the retaining screw if needed and lift the washer out carefully.
- Match the replacement exactly: Use the old washer to find one with the same size and thickness. A washer that is slightly too large or too small may not seal properly.
- Fit the new washer: Place it in the same position as the old one and secure it without overtightening the screw.
Before reassembling the tap, look at the valve seat inside the tap body where the washer presses down. If it is badly corroded, rough or damaged, a new washer may not be enough to stop the drip.
If your tap uses a cartridge do the following
- Match the old cartridge before buying a replacement: Cartridges vary in size, shape and fitting, even when the taps look similar from the outside.
- Check the orientation: Note how the old cartridge was positioned before fitting the new one, especially the location of any tabs or locating points.
- Check the seals: If the cartridge has rubber O-rings or seals, make sure they are present and sitting correctly.
- Fit the new cartridge: Insert it in the same position as the old one and make sure it sits securely before replacing the retaining nut or collar.
Do not force a washer or cartridge that does not fit properly. If the replacement part does not match the original, stop and get the correct part rather than trying to make it work.
Step 7: Reassemble the Tap and Test the Repair
Once the new washer or cartridge is fitted, put the tap back together in the reverse order you took it apart. Work carefully so the parts sit properly and you do not damage threads or seals by overtightening them.
- Refit the valve or cartridge: Make sure it is seated in the same position as the original before tightening the retaining nut or collar.
- Replace the tap handle: Refit the handle, screw and any decorative caps or covers you removed earlier.
- Turn the water supply back on slowly: Open the isolation valve or main supply gradually rather than all at once.
- Run the tap: Open and close it a few times to make sure the handle moves properly and the water flow is normal.
- Check for leaks: Look at the spout, around the handle, around the base of the tap and underneath the sink or basin.
If your leaking tap has stopped dripping and there is no water appearing elsewhere, the repair has worked. If it is still leaking, the problem may be with the valve seat, another seal, the cartridge, or the tap itself rather than the part you replaced.
What if the Tap Is Leaking Around the Base?
If water is collecting around the base of the tap rather than dripping from the spout, the problem is usually with a seal, O-ring or fitting rather than the washer or cartridge you have just replaced.
Start by drying the area completely, then run the tap and watch closely to see exactly where the water first appears. That will help you avoid taking the tap apart unnecessarily. Next check the following:
- The O-ring or base seal: A worn or damaged seal can allow water to escape where the tap body meets the sink or basin. If the seal looks cracked, flattened or brittle, it should be replaced.
- The tap fixing: If the tap has become loose, water can work its way underneath the base. Check that the fitting beneath the sink or basin is secure, but do not overtighten it.
- The connection between the spout and tap body: On some mixer taps, water can leak from the joint where the spout rotates. This may point to worn internal O-rings or seals.
- The flexible hoses underneath: If water is appearing around the base but actually starts underneath the sink, check the hose connections and fittings before assuming the tap itself is leaking.
Once you have identified the source, replace the damaged seal or O-ring if it is accessible and you can match the part correctly. If the tap body is cracked, badly corroded or continues leaking after the seals have been replaced, replacing the tap may be the more sensible option.

Why Is My Tap Still Dripping After Replacing the Washer?
If the tap is still dripping after you have fitted a new washer, the washer may not have been the only problem. Before replacing the whole tap, check whether another part is preventing it from sealing properly.
- The replacement washer is the wrong size: Even a small difference in diameter or thickness can stop the tap from sealing completely. Compare it with the old washer and make sure it sits flat and securely in the valve assembly.
- The valve seat is damaged: The washer seals against the valve seat inside the tap body. If that surface is pitted, rough or corroded, a new washer may still allow water through.
- The tap uses a cartridge rather than a washer: On mixer and quarter-turn taps, the drip may be caused by a worn cartridge or ceramic valve instead. Replacing a washer will not solve that type of fault.
- An O-ring or internal seal is worn: If water is also appearing around the handle or tap body, one of the internal seals may need replacing.
- The tap itself is badly worn: Older tapware can develop multiple faults at once. If several internal parts are worn or corroded, replacing the whole tap may make more sense than continuing to repair individual components.
If you have replaced the correct part and the tap still will not stop dripping, do not keep tightening it to try to force the seal. That can damage the washer, cartridge or valve further. At that point, it is worth checking the valve seat or having a plumber inspect the tap.
Should You Repair or Replace the Tap?
If the tap is still leaking after replacing the faulty washer, cartridge or seals, it is worth deciding whether another repair makes sense or whether the tap has reached the point where replacement is the better option.
Repair is usually worth trying when the tap is otherwise in good condition and the faulty part is easy to replace. A washer, O-ring, seal or cartridge is often far cheaper than replacing the whole fitting. Replacement may be the better option when:
- The tap is badly corroded: Corrosion can affect several internal parts at once and make future leaks more likely.
- It has already been repaired more than once: Repeated faults can be a sign that the tap is simply worn out.
- Replacement parts are difficult to find: Older or unusual taps may use cartridges or fittings that are no longer readily available.
- The tap body is cracked or damaged: Internal components will not fix damage to the body of the tap itself.
- Several parts are worn at the same time: Once you are replacing multiple components, a new tap may be the more sensible long-term option.
If the tap still looks good, works properly and only one replaceable part has failed, repair is usually worth trying first. If the fitting is old, damaged or repeatedly giving trouble, replacement can save you from having to keep fixing the same problem.
How Much Water Can a Leaking Tap Waste?
A leaking tap can waste far more water than it seems when the drip continues day and night. Even a relatively small leak can add up to hundreds or thousands of litres over a month.
According to the City of Cape Town, a leaking tap can waste around 400 to 2,600 litres of water per month, depending on how quickly it is leaking. Cape Town Government
That is why it is worth fixing a dripping tap sooner rather than leaving it for months. A small repair can reduce unnecessary water use and stop the problem from adding to your water bill.
When Should You Call a Plumber for a Leaking Tap?
If you have followed the basic repair steps and the tap is still leaking, the problem may be beyond a simple washer, cartridge or seal replacement. At that point, continuing to take the tap apart can cause more damage than it solves.
It is a good idea to call a plumber if:
- You cannot isolate the water properly: If the shut-off valve does not work or the water continues flowing, do not dismantle the tap while the supply is still live.
- The tap or fittings are seized: Corroded or badly stuck components can crack or break if they are forced.
- The leak is coming from the pipework: Water under the sink, inside a wall or around a connection may point to a plumbing issue rather than a fault inside the tap.
- A new washer or cartridge has not stopped the leak: This can indicate a damaged valve seat, another failed seal or wear elsewhere in the fitting.
- The tap is badly corroded or damaged: In that case, replacement may be more reliable than continuing to repair individual parts.
- You are not sure what part needs replacing: If the tap design is unfamiliar or the leak source is unclear, a plumber can diagnose it without unnecessary trial and error.
A simple leaking tap is often manageable as a DIY repair, but if the fault is not obvious or the repair has not worked, getting it checked professionally can save you from creating a bigger leak or damaging the tap altogether.

Stop the Drip Before It Becomes a Bigger Problem
A leaking tap is often caused by something simple, such as a worn washer, cartridge or seal, and fixing it early can stop the drip from wasting water or turning into a more frustrating plumbing problem.
If the tap is still leaking after you have tried the basic repair, Absolute Plumbing can help with tap repairs, replacements and other general plumbing problems across Cape Town. Contact us to arrange a visit, and we can assess the fault, explain what needs to be done and provide a quote.


